Tuesday, April 16, 2013

Chicken Empanadas


Chicken Empanadas 


There are a few recipes that I make that do not take long to disappear. 
This is one of those...

I've pretty much mastered the art of easy cooking. 
I learned to use short cuts because quit frankly...
Ain't nobody got time for that... 
WAIT...WHAT??? 
What just happened....

Oh social media, you have taken over my life. 
I can't avoid that meme for the life of me...
If you can't beat 'em, join 'em... Right?

To avoid further meme outbursts... Let's move on.


Recipe

2lbs Ground Chicken
1/2 Orange Pepper, Diced
1/2 Yellow Pepper, Diced
1 Package of Maggie Chicken Seasoning
1/2 Onion, Diced
5 Cloves Garlic, Grated
1 Tbsp Soy Sauce
1 Tbsp Worcester Sauce
8oz Cream Cheese
1 Cup Cheddar/Mozzarella Mix
20 Goya Discos Para Empanadas - Dough For Turnover Pastries
Black Pepper to Taste


This is the season packet that I used. 
If it's hard for you to find, use a packet of Sazon.


Dice the peppers into small cubes and mix cheeses in a bowl.
I used two different color sweet peppers because I like how it looks.
You can use just one color to keep it simple.
In a medium pot, cook the chicken, diced onion and garlic.
When chicken is cooked through, add soy sauce & worcester sauce to brown.


Turn off the stove and add the cheese and pepper mixture into the pot to combine.


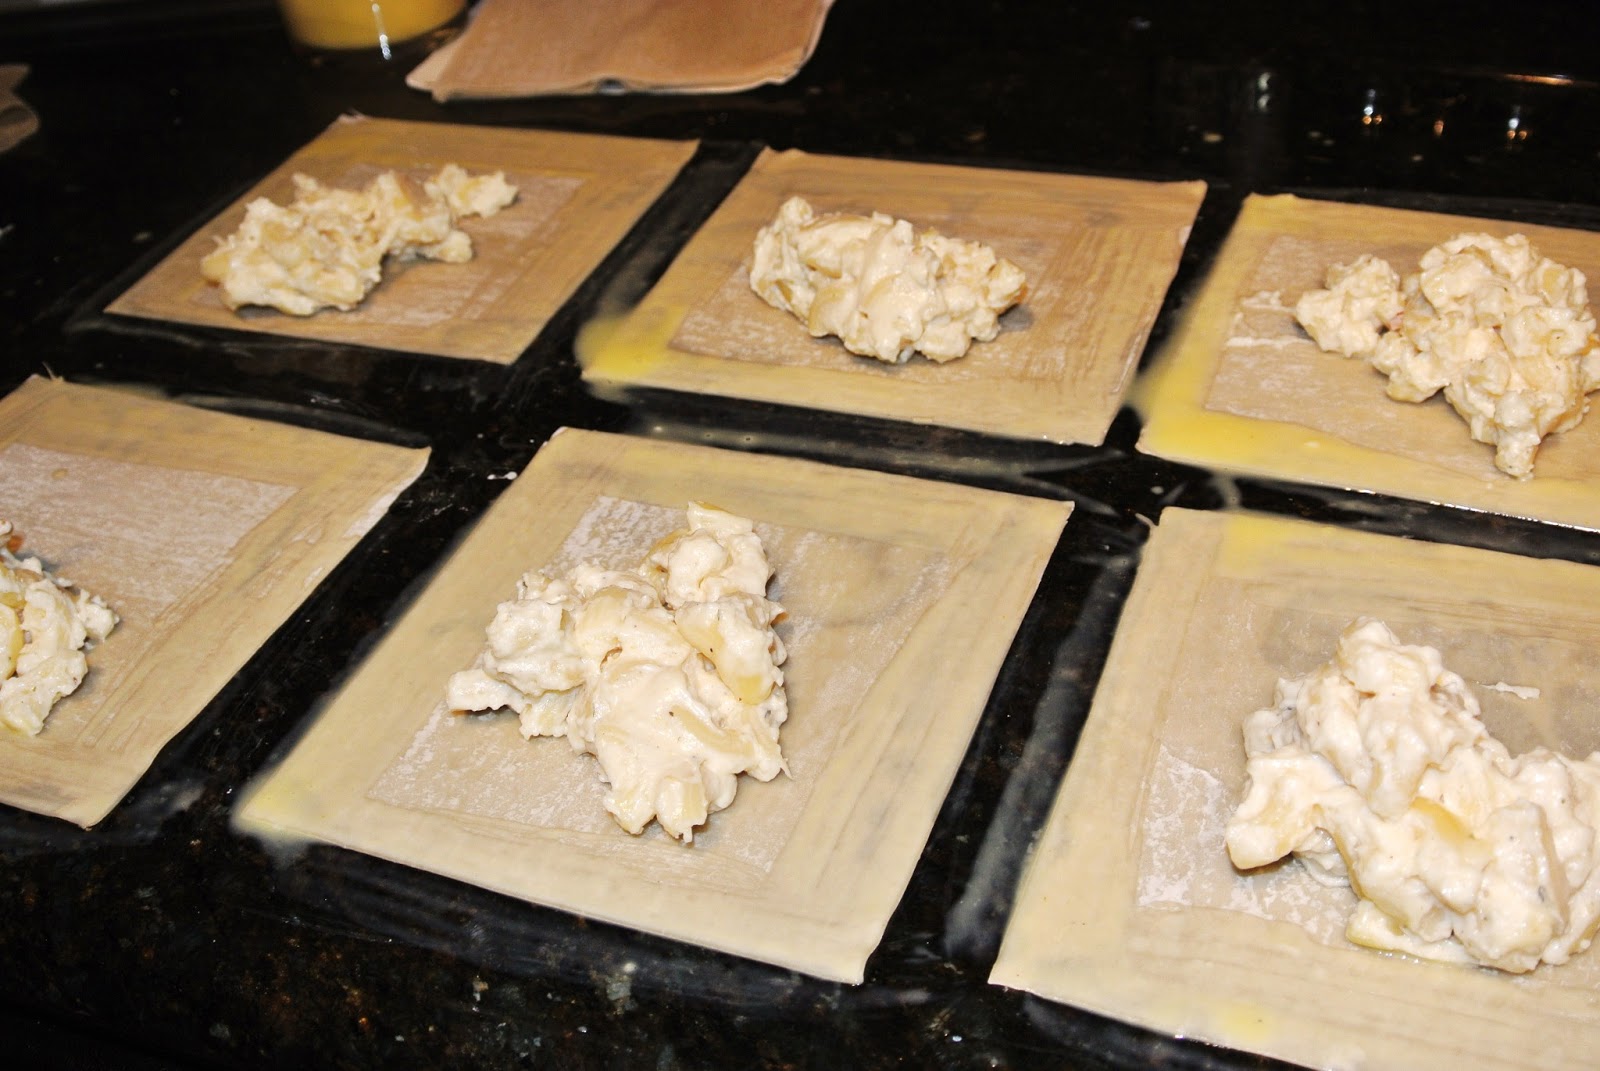
I cut the discs in half to make smaller empanadas but you can keep them whole if you'd like.
Add a spoonful of the mixture onto each.


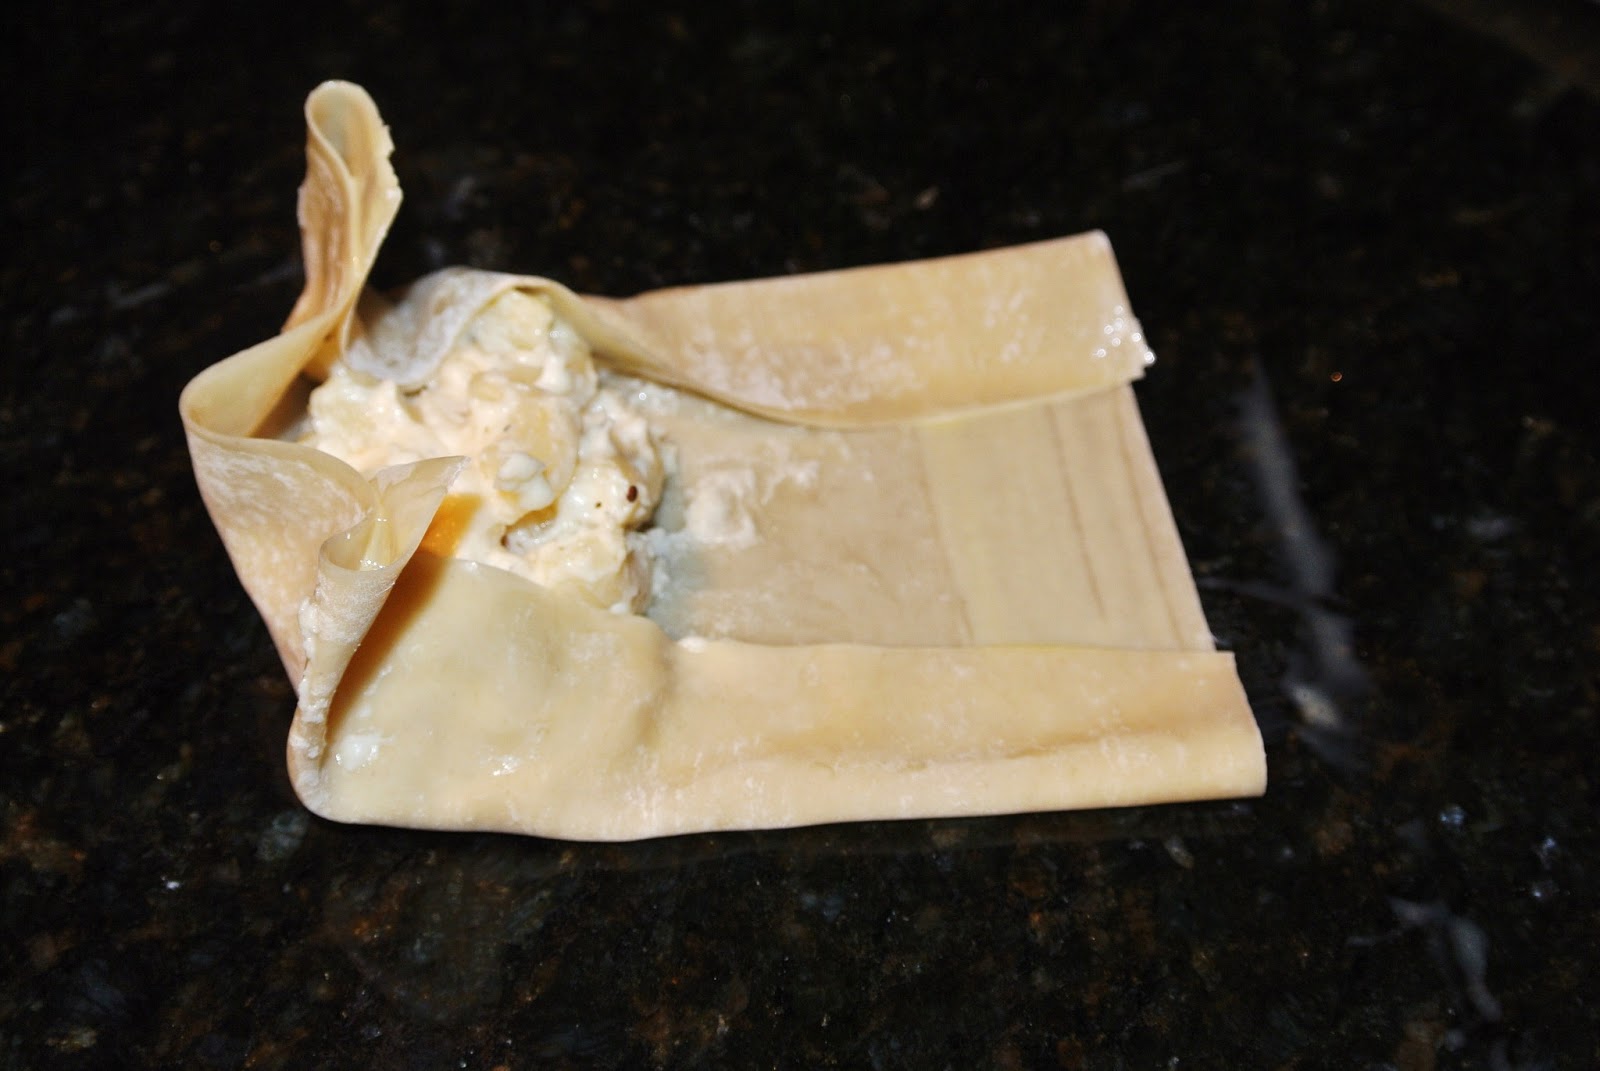
Fold over the dough and pinch the edges to seal.
Now you know that I like to get fancy so I used a fork to crimp the edges.


Deep fry in oil at medium heat until golden brown. 
You can also bake these to make them a little healthier.


Just looking at these makes me want to make some more right now!!!

Serve on a nice platter. 
No dipping sauce necessary because the creamy filling needs no help!


ENJOY!!!

Monday, April 15, 2013

Pray for Boston


There will be no recipe post today in respect for those who were 
injured and killed in today's tragedy.


Today, during the Boston Marathon, evil happened. 
While innocent men, women and children stood by the sidelines to cheer on their loved ones, 
the unthinkable happened. Bombs were set off, injuring so many and even killing some.

This was an extremely scary situation for not only those in the area, 
but all of the residents of this beautiful city who had to scramble to locate loved ones.

I was born on the island of Trinidad but Boston raised me. 
I have been lucky enough to call Boston my home for over 25 years. 
I have walked, traveled, worked, eaten, shopped and celebrated on that same street 
that is now covered in blood. 

Sadness has overcome all who call Boston home.
BUT...
We are STRONG!
Being a Bostonian does not just mean we like the Sox or Celtics... 
It means our pride in through and through.
These streets are our home. We walk through them with pride.

Today was terrible, yes, but I am so proud of my fellow citizens. 
More than I have ever been. 
We will overcome this tragedy. 
No hate and evil can break the love and passion that we have for our city.


Please Pray For Boston.


Sunday, April 14, 2013

Pizza Crescent Rolls


Pizza Crescent Rolls


Let's talk...

Pizza is probably one of my least favorite foods.
Seriously...
I was probably the only kid who hated pizza day in school...

I don't really like being the weirdo friend 
so I had to find a way to fit in with the rest of society. 
So I found a way to make the whole pizza thing work for me 
and of course, as usual, it's as simple as 1, 2, 3...


RECIPE

Crescent Rolls
Pepperoni (I used jalapeno & cheddar flavor)
Cheddar Cheese
Tomato Sauce


You can add just about any pizza topping that you like 
but to keep it simple, I went with pepperoni.
Chop it up into small pieces.


Roll out your crescent dough and spoon on a thin layer of tomato sauce.
Try no to go all the way to the edges.
Sprinkle on your pepperoni and cheese.


Roll your dough into crescent shapes and bake at 350* until golden brown.


It's just that simple!!!
Serve with a side of tomato sauce for dipping!


ENJOY!!!


Saturday, April 13, 2013

Mac 'n' Cheese Spring Rolls


Mac 'n' Cheese Spring Rolls


It's probably not the best idea to eat these everyday... 
Actually, I would probably only eat these once a year...
I mean... Unless you like gaining 50lbs in one sitting!

But it's OK to indulge once in a blue moon... right?

A friend of mine is throwing a birthday party for her son, 
who by the way is one of the SMARTEST kids on the planet!!
If there was anything better than an A+, he would get it!

He loves junk food and I thought I'd come up with a few recipes 
that would be kid friendly and easy to make!

And then this happened!


RECIPE

1 Box Elbow Macaroni
4 Tbsp Unsalted Butter 
1/3 Cup All Purpose Flour
2 1/2 Cups Half & Half (or whole milk)
8 Ounces of Sharp Cheddar
4 Ounces Jack Cheese
2 Tsp Dijon Mustard
1 Tsp Salt
1/2 Tsp White Pepper
1 Tbsp Garlic Powder
1 Egg, beaten
24 Spring Roll Wrappers
Cooked Bacon (optional)


Start by cooking your pasta according to the directions on the box.

In medium saucepan, melt your butter and add your flour to make a roux. 
This is the base of the cheese sauce.
When it starts to smell like toasted nuts, 
add the milk, cheese, garlic powder, salt, pepper, and mustard.
Adjust the mustard to your preferred taste.


It will thicken and look like heaven in a pot!!! 
At this point, I would have loved to add some cooked bacon but I didn't have any.
You should do it though!! 


Drain your pasta and mix into the sauce.
Set it aside and let it cool down. 
If the mixture is too hot, it will make the wrapping process way too messy!


Once it's cool, 
lay out your wrappers and add a spoonful of the mixture to each.
In a small bowl, combine your egg and 1 Tsp of water.
Brush the egg mixture onto the edges of the wrappers.


Fold the sides first...


...then roll it over and make sure you pull it tight. 
Brush a bit more of your egg mixture on the edge and roll it one more time to seal.


Bring your oil to medium heat and deep fry until golden brown.


Pile them up on a pretty platter and serve while they are hot!


Happy 10th Birthday Anthony!!


ENJOY!!!

Friday, April 12, 2013

Curry Shrimp


Curry Shrimp


Remember when I said that you won't be able to find a curry recipe here?
Here's the thing...
I LOVE CURRY SHRIMP!
Well, I love shrimp in general but when it comes to curry shrimp, 
I'm a happy little camper!

So learning how to cook curry was kind of a MUST in this case...


Let's start by talking about this ^...
In Trinidad, we call it Bandania or Chado Beni.
In America, it's kind of hard to find.
It's called Recao at my local Caribbean grocery store and it's kinda of a MUST.
It tastes pretty similar to Cilantro but it's definitely not the same.

Anyway...
Make a green seasoning out of it.
3 Leaves of Bandania
5 Cloves of Garlic
Blend it up with a little water...


It should look like this ^


RECIPE

4 lbs of Shrimp
2 Tomatoes, chopped
1 Medium Onion, Chopped
1 Tbsp of Vegetable Oil
2 Tbsp of Curry Powder
1/2 Habanero Pepper (optional)
Green Seasoning (recipe above)


Mix your cleaned shrimp, onions, tomatoes, green seasoning and pepper together.
You can do this the night before and leave it in the fridge if you'd like.


In a large pot, heat you oil on high.
Mix a little bit of water into your curry powder in a bowl and add it to your HOT oil.
Fry it up for a bout 30 seconds or until you see the color change and it starts to cook.


Add your shrimp mixture into the pot and stir it to combine.

Your shrimp will start to produce liquid. 
Just let it cook until the liquid cooks off and it starts to fry.


Depending on your stove, your cook time will vary. 
Gas stoves tend to cook fast because of higher, direct heat.
Once your shrimp is at this state ^,
just let it cook on med-high heat.


And you will get this^.
I added a little water towards the end to make sure I had enough sauce.


All of the solid seasoning that you added at the beginning 
should not be solid anymore.
You will only have shrimp and sauce at this point.
That's how you will know it finished.
Add salt to taste.
Adding salt before this will cause the shrimp to produce more liquid
and you would end up overcooking.


You're Done!
Serve over rice with a nice green salad.


ENJOY!!!

Thursday, April 11, 2013

Chocolate Covered Oreos


Chocolate Covered Oreos


Ok, Let's talk about overindulgence.

I think these cookies might be somewhere in the definition... 
Just Sayin'
BUT, I have a good excuse for making these! 
I SWEAR!!!
No, really I do!

See, My Big Sis is preggers and I'm kind of obsessed with the idea 
of being an aunty for the first time.
Her baby shower is just around the corner and we decided to have a SWEET BAR!
A table full of desserts and candy!!!
How fun does that sound??

I KNOW RIGHT!?!?


I figured I should get some practice in before the big day...
So, here I am, trying to be fancy... Kinda...
I Googled sweet bars and was bombarded with pictures of chocolate covered Oreos.
Seems simple enough...


What You Will Need

Package of Oreos
Various Bags of Melting Chocolate
Edible Decorations of Your Choice
Fork or Spoon
Wax Paper
Plastic Food Storage Bags
Food Coloring


Melt the chocolate according to the directions on the package.

The baby shower is a Nautical Theme and the colors are 
Navy Blue, Yellow, and Gray.
You can just get a few bags of white chocolate and add in food coloring but
I was lucky enough to find yellow and blue chocolate at the craft store.

Of course, You can use any color that you like.


Dip your Oreos into the melted chocolate.


And lay them on a sheet of waxed paper. 
Using a fork or spoon will make this process much easier.
Leave it alone for a few minutes and the chocolate will firm up.


Here's the fun part!!
Time to get fancy!!

Pour some of the colored chocolate into a plastic bag and 
squish it all down to one on the corners.
Yeah, I said SQUISH!
How often in life do you get the chance to use that word?!


Cut a tiny hole at the tip of the bag and drizzle over the cookies.


Don't worry about making a mess. 


Once the chocolate dries, you can just break off the edges that are crazy looking. 
Or if you're trying to be fancy like me, 
use a sharp little knife to carve the edges into the perfect circle.


All Done!! 
It's pretty easy once you get a a mental picture of what you want it to look like in your head.

These things are amazing!! 
And this is coming from a girl who isn't the biggest fan of sweets.

When I make these for the actual shower, I'll have to find navy blue food coloring.
These are a bit to bright... 
But that's not your problem so I'll just shut up about it.

Anyway, Have fun making these and don't worry about messing up 
because there's no such thing in this recipe! :) 
Well, I guess you could accidentally burn the chocolate, 
but if you don't do that, you'll be OK.


ENJOY!!!


Wednesday, April 10, 2013

Spicy Salmon Cakes


Spicy Salmon Cakes


Whenever my friends and I get together, I hear this...

Are you making those fish cakes???

And YES, I make them every time... 
I mean, what kind of friend would I be if I didn't??? 
I've been making these since high school and I haven't gotten tired of them yet!!!

It's so simple to make and I even came up with a quick little sauce to make
them Ooooooo & Aahhhhhhh... 

Anyone can do this!!!


This is it... All the ingredients you need.. 
See?? 
I told you it was simple!!!


SALMON CAKE RECIPE

2 Cans of Salmon (drained)
2 Cups of Chipotle Panko 
3 Eggs
2 Tbsp of Old Bay
1 Green Pepper (diced into small cubes)
4 Large Cloves of Garlic (grated)
4 Green Onions (chopped)
Black Pepper to Taste
Red Pepper Flakes to Taste


Ok, Time to get messy!!! 

Mix all of your ingredients in a large mixing bowl.
Put that spoon down!! 
Use your hands!! 
You really want to work this together so don't be afraid to get your hands dirty!


Form the mixture into small patties. 

If it's too dry, add an egg. 
If it's too wet, add some more Panko.

Just make sure it sticks together and isn't falling apart...


In a shallow frying pan, add enough vegetable oil to fry these babies up!
You want to have enough oil to cover the bottom half of the patties when frying.

Heat the oil to medium heat.

Too hot, and it wont cook through.
Too cool, and it will just be an oily mess...


When the bottoms are golden brown, flip them.
Be careful not to burn yourself!!!


Place the cakes on a few sheets of paper towels to drain off the excess oil.

At this point, it's a struggle to resist the urge to eat them all 
before they hit the serving platter!!! 

Fight it!!! Be Strong!!!


While you fry up the rest of your salmon cakes, 
here's something to distract you from sneaking tastes!

Time to make the sauce...


SPICY TATAR SAUCE RECIPE

1 Jar of Tatar Sauce
Spoonful of Hot Pepper Sauce
3 Green Onions (chopped)


Ok, Now I know I just scared you!! 
What is that?? 
Well it's pretty much my mom's homemade hot pepper sauce.
She grinds up habanero peppers, garlic and vinegar and we eat it with everything!!!
It's a Caribbean thing... We keep jars of it on hand!!!

And I tend to over-do it in my sauce, but that's how I like it!
Hot! Hot! Hot!


You can buy different versions of this in the international section of your grocery store, 
or just use your hot sauce of choice.

Or, If you're not into the spicy business,
skip it all together and just use plain tartar sauce.


Mix it up and set aside. 

I'll admit .... at this point, 
I've already eaten 3 or 4 salmon cakes...

I couldn't help myself!!!


Put what's left of it on a pretty platter and serve!


ENJOY!!!