Monday, April 22, 2013

Buffalo Chicken Cheese Balls

Buffalo Chicken Cheese Balls


I've been pretty obsessed with Pinterest lately and came across a recipe for
buffalo chicken cheese balls. I followed the exact recipe 
but it just wasn't the greatest
thing I ever ate.. 
So I changed it!
There I go again, saving the world and such...

This masterpiece right here is not only a deliciousness overload,
but as usual, it's as simple as can be!


RECIPE

1 Rotisserie Chicken, Cooked
2 Cups Sharp Cheddar Cheese
1/2 Cup Franks Hot Sauce
4 Stalks of Green Onion
5 Sprigs of Cilantro
2 Jalapenos
1 Tbsp Garlic Power
2 Eggs
Panko Bread Crumbs
All Purpose Flour


Pull apart the rotisserie chicken. Shred the meat and discard the skin and bones. 
Dice up the green onions, cilantro, and jalapenos. 
Most of the hot pepper action lives in the jalapeno seeds, so discard those. 
Add the cheese and hot sauce.
Mix this all together until you are able to form a ball out of the mixture.
This works best when the chicken is still warm.


Form the mixture into little balls and set aside.


Put the flour, eggs and panko into three separate bowls/plates. 
Roll the balls in the flour, dip into the eggs and roll in the panko to coat.
I know that seems like a excessive amount of coating
but this keeps the cheese from just melting and falling apart while frying.


This is what you will get. ^
Deep fry these in vegetable oil at medium heat until golden brown.


There you go! 
Little morsels of goodness!!
Pile high and serve with a side of blue cheese!


ENJOY!!!


Sunday, April 21, 2013

Note to Readers


I want to thank every single one of you! 

This blog has only been active for 12 days and has already received over 2,000 page views!

I've been able to post every day so far but I have to take a break from this for a little while.
I will still be posting often, just not every single day.

A new chapter in my life will begin very soon and I need to get myself ready for that!

To keep up with this blog, please follow me on BlogLovin.
Just follow the link and sign up. 
It's free and you will get an email whenever I post!

Add my Blog:
nadiamirandacooks.blogspot.com

Thank you again for your support!!!
See you all soon! 

XOXOXO
Nadia

Friday, April 19, 2013

Bonbons


 Bonbons


I'm kind of giggling as is write this because childhood memories are flashing back!!!

Do you know what bonbons are? 


According to Wikepidia:

"The name bonbon (or bon-bons) refers to any of several types of sweets, 
especially small candies enrobed in chocolate.
The first reports of bonbons come from the 17th century, 
when they were made at the French royal court..." 
Blah blah blah...

Let get real here.
Peggy Bundy ate bonbons and that's the only reason we know what they are.
Oh that skinny, leopard print wearing, big red hair having, sexually frustrated woman..
She was AWESOME!! 
That family never had enough money for bread and butter but 
somehow Peggy always had bonbons while she watched Oprah!
Oh how I miss that show... 
As horrible of a production as it was, It was part of growing up in the 90's...
Memories...

Ok, Ok... Enough of that..
Back to the bonbons...
Basically they are the back in time version of what cake pops are today;
Minus the sticks.

Recipe
Box Cake Mix
Can of Frosting
Baker's Chocolate
Baking Decorations
Food Coloring


I used boxed cake mix because I'm not one of those people who can pull a cake recipe out of thin air.
You on the other hand, can use what ever cake recipe that you know.

Bake the cake according to the directions on the package. 


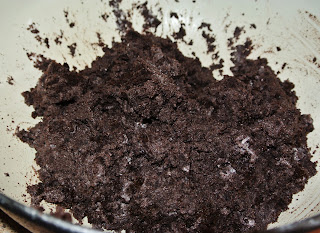
Let the cake cool and crumble into a bowl with about 1/4 of the frosting from the can.


Use your hands to mix this all together. It should be the consistency of dough.
Able to stick together and not falling apart.


Roll into bite-sized balls and place into freezer 
for about 20 minutes (or overnight).


Melt the chocolate according to the directions on package.
Dip cake balls into chocolate and place onto wax paper.
I used white chocolate and orange food coloring.
If you want to mold the chocolate and add decorations, 
now would be the time to do so.
Work fast because the chocolate will set pretty quick 
because of the coldness of the frozen cake.

I used the back of a spoon to twirl the chocolate around the cake to make it look fancy
You know how much I like to be fancy!
I also added edible pearl decorations. 
Let the bonbons come back to room temperature before eating.


Serve on a fancy little plate and pretend that you are royal..
... or just eat 'em off of the wax paper and pretend you are Peggy Bundy.
Whatever floats your boat!

Don't forget the leopard print!


ENJOY!!!


Thursday, April 18, 2013

Old Fashioned Ribbon Sandwiches


Old Fashioned Ribbon Sandwiches


I don't know about you but when I see these things, 
I get super excited!

Any Trinidadian will be able to tell you many, many stories built around these sandwiches.
We hated them when we were little 
but then started to love them once our American friends 
thought it was so cool that we had multicolored sandwiches.
Then we started to request them for lunch...

Are these healthy? NOPE!
Not even a little...
But they were quick to make and fun to eat...
And quite frankly, cheap to make a big batch of these!


RECIPE

Sliced Bread
1 Tbsp Mustard
1 Tbsp Mayonnaise
8 Tbsp Butter
8 Oz Sharp Cheddar Cheese (I used Hot Habanero Cheddar)
Food Coloring


Finely grate the cheese and butter so it can be easily combined.
Add mustard and mayonnaise.
Use a hand mixer to whip this all together.
I somehow misplace my mixer so I had to do it by hand.
Who the heck misplaces a hand mixer???


Mix until it is nice and smooth.
Separate into 3 equal batches and 
add 3 different colors of food coloring.


Each sandwich will have 3 layers.
Spread a thin layer of the cheese mixture, each color on a separate piece of bread.
Cut off the crust and slice diagonally into triangles.


This recipe will be enough for an entire loaf of sliced bread.
Quick and easy.
Not so healthy but oh well...
Live a little!


ENJOY!!!


Wednesday, April 17, 2013

Chocolate Pretzel Snax


Chocolate Pretzel Snax


Oh the sugar overload going on in my house is out of control!
But this one has a valid excuse!

Yesterday was my Daddy's birthday and he has the biggest sweet tooth!
After throwing a full pound of Lindt chocolates in with his gifts, 
I thought I'd make him something a little different!

I think this qualifies me for the BEST DAUGHTER EVER AWARD...
Please vote accordingly! ;)
I think I might win! 
And I think you guys are gonna love this little snack.
It only take a few minutes 
and if you happen to have a few bored kids on school vacation this week, 
call them in the kitchen and let them help! 
See? Now I'm fixing family bonding time here... 
I totally deserve an award!


Let's get stared here...

What You Will Need:

Hershey's Kisses
M&Ms
Pretzels (the square ones)


These pretzels work the best. It make everything nice and neat.


Heat your oven to 350*.
Line a baking pan with a single layer on pretzels. 
Place a Hershey's Kiss on each.


Pop these into the oven until the chocolate looks like they are starting to sweat...
Uhhhh... That sounded gross.. SORRY!
The Chocolate will not change shape but it's soft enough for the next step.


Place an M&M on each and push down.


Let these cool and the chocolate will firm right back up.
It's a no-brainer recipe. 
These may seem to be just regular little snacks but trust me!!!
Once you get the flavors of sweet and salty; the buttery goodness from the preztels and the smooth textures of the chocolate...
You just won't be able to get enough!!!
My Dad loved them! 
And I have to admit, I kind of helped him eat 1/2 these!
I mean.. That's what daughters are for, Right?


Serve in a pretty little bowl.

ENJOY!!!

Tuesday, April 16, 2013

Chicken Empanadas


Chicken Empanadas 


There are a few recipes that I make that do not take long to disappear. 
This is one of those...

I've pretty much mastered the art of easy cooking. 
I learned to use short cuts because quit frankly...
Ain't nobody got time for that... 
WAIT...WHAT??? 
What just happened....

Oh social media, you have taken over my life. 
I can't avoid that meme for the life of me...
If you can't beat 'em, join 'em... Right?

To avoid further meme outbursts... Let's move on.


Recipe

2lbs Ground Chicken
1/2 Orange Pepper, Diced
1/2 Yellow Pepper, Diced
1 Package of Maggie Chicken Seasoning
1/2 Onion, Diced
5 Cloves Garlic, Grated
1 Tbsp Soy Sauce
1 Tbsp Worcester Sauce
8oz Cream Cheese
1 Cup Cheddar/Mozzarella Mix
20 Goya Discos Para Empanadas - Dough For Turnover Pastries
Black Pepper to Taste


This is the season packet that I used. 
If it's hard for you to find, use a packet of Sazon.


Dice the peppers into small cubes and mix cheeses in a bowl.
I used two different color sweet peppers because I like how it looks.
You can use just one color to keep it simple.
In a medium pot, cook the chicken, diced onion and garlic.
When chicken is cooked through, add soy sauce & worcester sauce to brown.


Turn off the stove and add the cheese and pepper mixture into the pot to combine.


I cut the discs in half to make smaller empanadas but you can keep them whole if you'd like.
Add a spoonful of the mixture onto each.


Fold over the dough and pinch the edges to seal.
Now you know that I like to get fancy so I used a fork to crimp the edges.


Deep fry in oil at medium heat until golden brown. 
You can also bake these to make them a little healthier.


Just looking at these makes me want to make some more right now!!!

Serve on a nice platter. 
No dipping sauce necessary because the creamy filling needs no help!


ENJOY!!!

Monday, April 15, 2013

Pray for Boston


There will be no recipe post today in respect for those who were 
injured and killed in today's tragedy.


Today, during the Boston Marathon, evil happened. 
While innocent men, women and children stood by the sidelines to cheer on their loved ones, 
the unthinkable happened. Bombs were set off, injuring so many and even killing some.

This was an extremely scary situation for not only those in the area, 
but all of the residents of this beautiful city who had to scramble to locate loved ones.

I was born on the island of Trinidad but Boston raised me. 
I have been lucky enough to call Boston my home for over 25 years. 
I have walked, traveled, worked, eaten, shopped and celebrated on that same street 
that is now covered in blood. 

Sadness has overcome all who call Boston home.
BUT...
We are STRONG!
Being a Bostonian does not just mean we like the Sox or Celtics... 
It means our pride in through and through.
These streets are our home. We walk through them with pride.

Today was terrible, yes, but I am so proud of my fellow citizens. 
More than I have ever been. 
We will overcome this tragedy. 
No hate and evil can break the love and passion that we have for our city.


Please Pray For Boston.


Sunday, April 14, 2013

Pizza Crescent Rolls


Pizza Crescent Rolls


Let's talk...

Pizza is probably one of my least favorite foods.
Seriously...
I was probably the only kid who hated pizza day in school...

I don't really like being the weirdo friend 
so I had to find a way to fit in with the rest of society. 
So I found a way to make the whole pizza thing work for me 
and of course, as usual, it's as simple as 1, 2, 3...


RECIPE

Crescent Rolls
Pepperoni (I used jalapeno & cheddar flavor)
Cheddar Cheese
Tomato Sauce


You can add just about any pizza topping that you like 
but to keep it simple, I went with pepperoni.
Chop it up into small pieces.


Roll out your crescent dough and spoon on a thin layer of tomato sauce.
Try no to go all the way to the edges.
Sprinkle on your pepperoni and cheese.


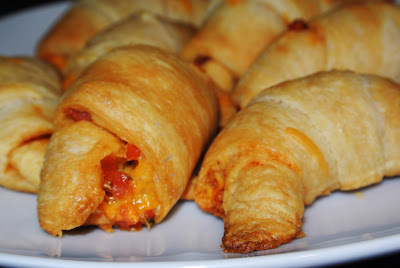
Roll your dough into crescent shapes and bake at 350* until golden brown.


It's just that simple!!!
Serve with a side of tomato sauce for dipping!


ENJOY!!!


Saturday, April 13, 2013

Mac 'n' Cheese Spring Rolls


Mac 'n' Cheese Spring Rolls


It's probably not the best idea to eat these everyday... 
Actually, I would probably only eat these once a year...
I mean... Unless you like gaining 50lbs in one sitting!

But it's OK to indulge once in a blue moon... right?

A friend of mine is throwing a birthday party for her son, 
who by the way is one of the SMARTEST kids on the planet!!
If there was anything better than an A+, he would get it!

He loves junk food and I thought I'd come up with a few recipes 
that would be kid friendly and easy to make!

And then this happened!


RECIPE

1 Box Elbow Macaroni
4 Tbsp Unsalted Butter 
1/3 Cup All Purpose Flour
2 1/2 Cups Half & Half (or whole milk)
8 Ounces of Sharp Cheddar
4 Ounces Jack Cheese
2 Tsp Dijon Mustard
1 Tsp Salt
1/2 Tsp White Pepper
1 Tbsp Garlic Powder
1 Egg, beaten
24 Spring Roll Wrappers
Cooked Bacon (optional)


Start by cooking your pasta according to the directions on the box.

In medium saucepan, melt your butter and add your flour to make a roux. 
This is the base of the cheese sauce.
When it starts to smell like toasted nuts, 
add the milk, cheese, garlic powder, salt, pepper, and mustard.
Adjust the mustard to your preferred taste.


It will thicken and look like heaven in a pot!!! 
At this point, I would have loved to add some cooked bacon but I didn't have any.
You should do it though!! 


Drain your pasta and mix into the sauce.
Set it aside and let it cool down. 
If the mixture is too hot, it will make the wrapping process way too messy!


Once it's cool, 
lay out your wrappers and add a spoonful of the mixture to each.
In a small bowl, combine your egg and 1 Tsp of water.
Brush the egg mixture onto the edges of the wrappers.


Fold the sides first...


...then roll it over and make sure you pull it tight. 
Brush a bit more of your egg mixture on the edge and roll it one more time to seal.


Bring your oil to medium heat and deep fry until golden brown.


Pile them up on a pretty platter and serve while they are hot!


Happy 10th Birthday Anthony!!


ENJOY!!!